Add & invite members
Build your roster by emailing invitations to members, who set their own passwords — or add members directly and manage roles and permissions.
About 5 minutesStep 2 of 19 in team setup
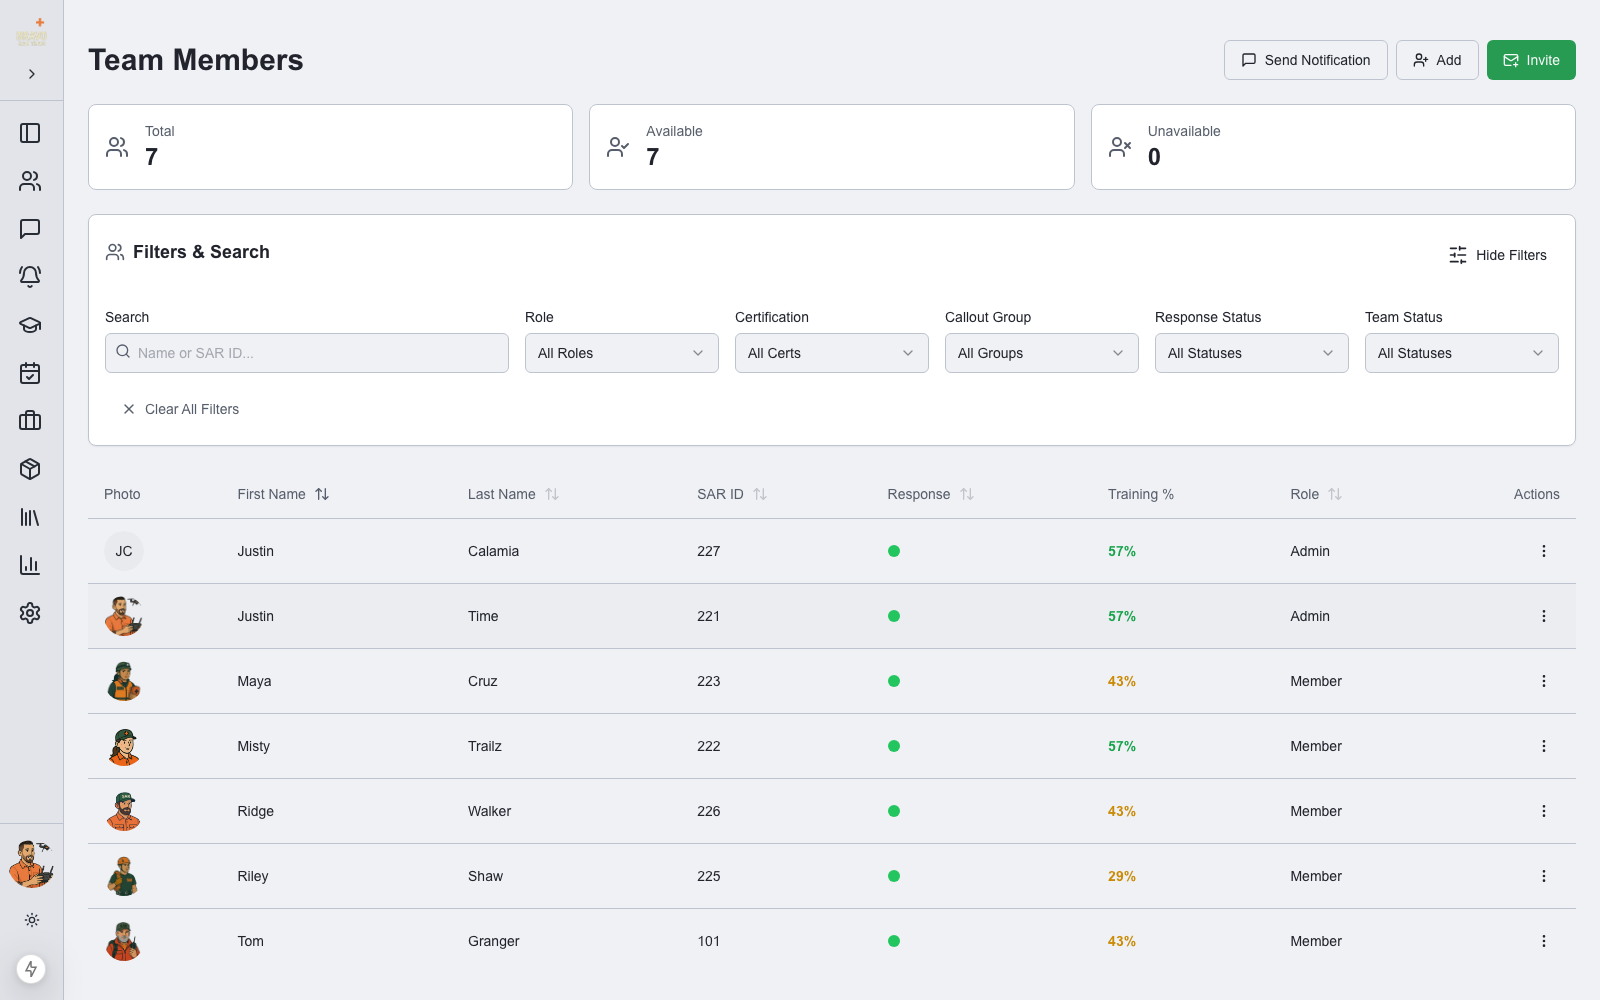
Open Team Members
Click Team Members in the sidebar (or expand the Team Members section in Admin Settings). The roster shows every member with their SAR ID, response status, training attendance percentage, and role. Three buttons in the top-right corner drive everything: Send Notification, Add, and Invite.
Send an invitation
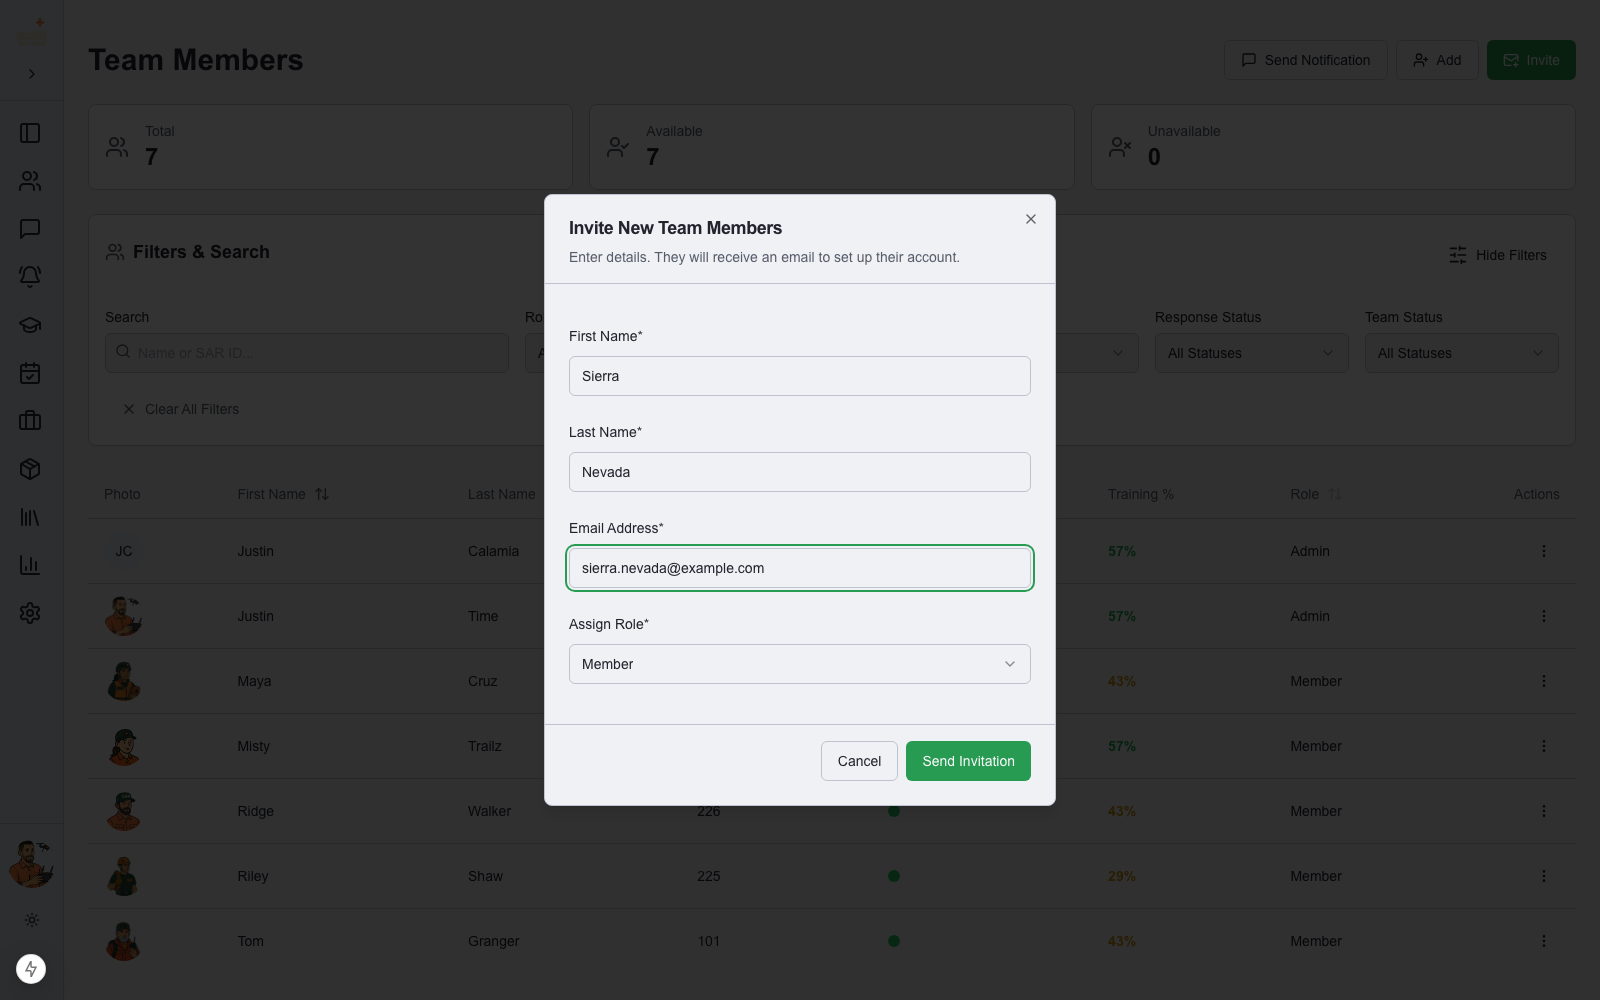
Click Invite. Enter the member’s first name, last name, and email address, and assign a role — Member or Admin. Click Send Invitation.
The member receives an email with a secure join link. When they open it, their name is pre-filled; they add an optional SAR ID, choose a password, and land directly on your team’s dashboard. No manual account setup on your end.
Pending invitations are listed in Admin Settings → Team Members, where you can revoke any invite that hasn’t been accepted yet.
Or add members directly
Use the Add button to create a member profile yourself — useful for members who don’t need a login right away or for pre-loading your roster. You can set their SAR ID, role, certifications, skills, callout groups, and positions all in one form.
Assign roles and permissions
Admins can manage everything; Members see the day-to-day views. For finer control, open any member’s profile to grant individual permissions like creating callouts, creating trainings, or managing equipment — so a training officer or operations lead can run their area without full admin access.